18 Top Tips For Quality Refractometer Results - Part 3: Sample preparation & taking a reading
In the last blog we discussed the benefits of taking time to choose the right refractometer for you, competencies and sample preparation. Part 3 of our Refractometer Top Tips will focus on taking measurements with a refractometer and how temperature can effect samples and readings.
If you haven’t read part one or part two of our Refractometer Top Tips then why not take a look to learn about refractometer 101 and quality control, as well as operating procedures and refractometer sample preparation. Here though, we continue with our 18 Top Tips For Quality Refractometer Results.
7. Apply the right amount of sample to the refractometer prism
 When taking a reading with a refractometer it is sensible to apply the right amount of sample. If you apply too much it will take longer to stabilise — much like having too much water in a kettle or pot will cause it to take longer to boil.
Likewise if you apply too little the interface between the prism and sample will not refract properly. To ensure best performance always use the refractometer presser, plate or flap if fitted. Always make sure that you read the instrument’s manual for advice on sample size.
8. Watch out for highly concentrated layers or “skins”
When measuring sugar syrups with a refractometer always ensure that you take time to stir the syrup sufficiently before taking a sample. This is the best way to avoid highly concentrated (and unrepresentative) “skin” that can form on top. (Imagine serving the skin on top of a custard, rather than the creamy goodness underneath – it’s not what you want, or what you’d expect!)
Just as important is to make sure that you do not stir too vigorously though; you don't want to entrap micro air bubbles that may also interfere with the refracted ray!
9. Some like it hot!
To take a measurement of refractive index refractometers need to “see through” a sample. Heat up viscous, semi-solid and solid samples like waxes, fats, edible oils & butter to take a reading with your refractometer.
When measuring hot samples next to the production line, you should reduce stabilisation times by increasing the instrument’s temperature to that of the sample. Then use temperature compensation to give the result as if it was at 20°C.
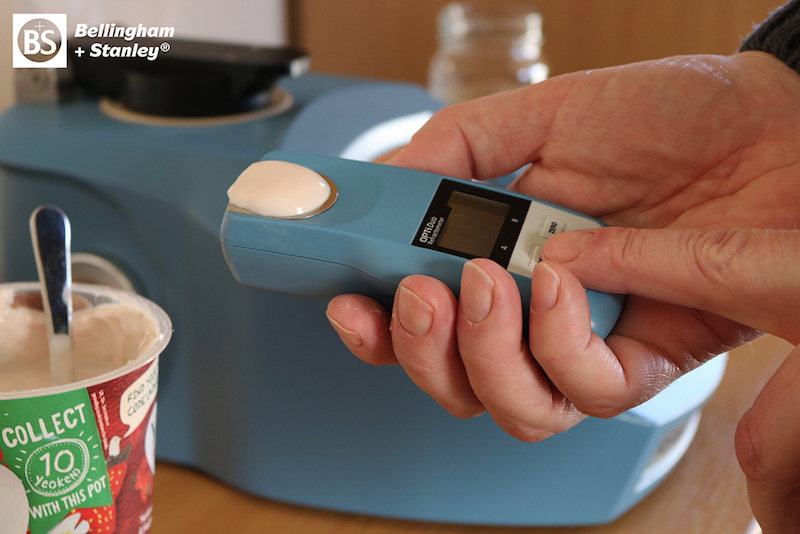
This technique also applies to refractometers measuring the total solids of instant coffee prior to freeze drying so that sediment doesn’t form on the prism whilst waiting for equilibrium.
10. Manage the effects of temperature
Optical handheld refractometers offer limited temperature correction using a manual offset or bimetallic strip allowing you to compensate. Most users of handheld refractometers will find this adequate for the typical measurement offered from such an instrument. As an improvement to this some digital handheld refractometers use a technique called sugar compensation. For other non-sugar samples, high grade digital handheld refractometers, such as the OPTi Digital Handheld Refractometer from Bellingham + Stanley, use application specific compensation to provide a far more accurate result.
For accuracy and convenience digital bench-top refractometers found in laboratories or factories use electronic/mathematical temperature compensation for sugar-based products but for ultimate performance, look for Peltier temperature controlled refractometers.
Peltier temperature controlled refractometer systems control the prism and surrounding plate so that the sample is controlled to the desired measurement temperature. Ideal for those non-sugar organics and inorganic samples.
11. Wait for temperature stabilisation to avoid moving targets
Always give the sample enough time to stabilise to the ambient temperature of the refractometer. Failure to do so will result in your refractometer borderline (and therefore your reading) will literally be moving!
Modern laboratory instruments offer stability checks so that the reading will only given after a set time, or better still, when the instrument detects both sample and temperature readings have stabilised – SMART!
12. Keep your refractometer prism clean
Remember to clean the prism and plate of your refractometer after each and every use! It is also important to dry it properly. Cross-contamination between samples and cleaning materials will create erroneous results the next time it is used.
The cleaning process is critical when using reference materials to verify the instrument.
13. Sanity check
If the reading isn’t what you expected or if on an optical handheld refractometer the borderline doesn’t look as sharp as it normally does for that sample, start again!
For digital refractometers that feature a quality indicator, check to see if the number is correct for the sample being measured. Some “Methods based” refractometers, such as the RFM900-T from Bellingham + Stanley, with limit checking function also allow you to set a threshold for each sample so that anything unusual is displayed to the user as an error message. Limit functions may also be applied to the temperature and quality number as well as the measured sample reading.
Next time our 18 top tips for achieving quality results from your refractometer will continue with a look at how to continuously achieve accurate results through calibration and maintenance. In the meantime, if you’d like to learn more about Bellingham + Stanley refractometers visit our refractometer overview or contact the B+S customer care team today.