Background
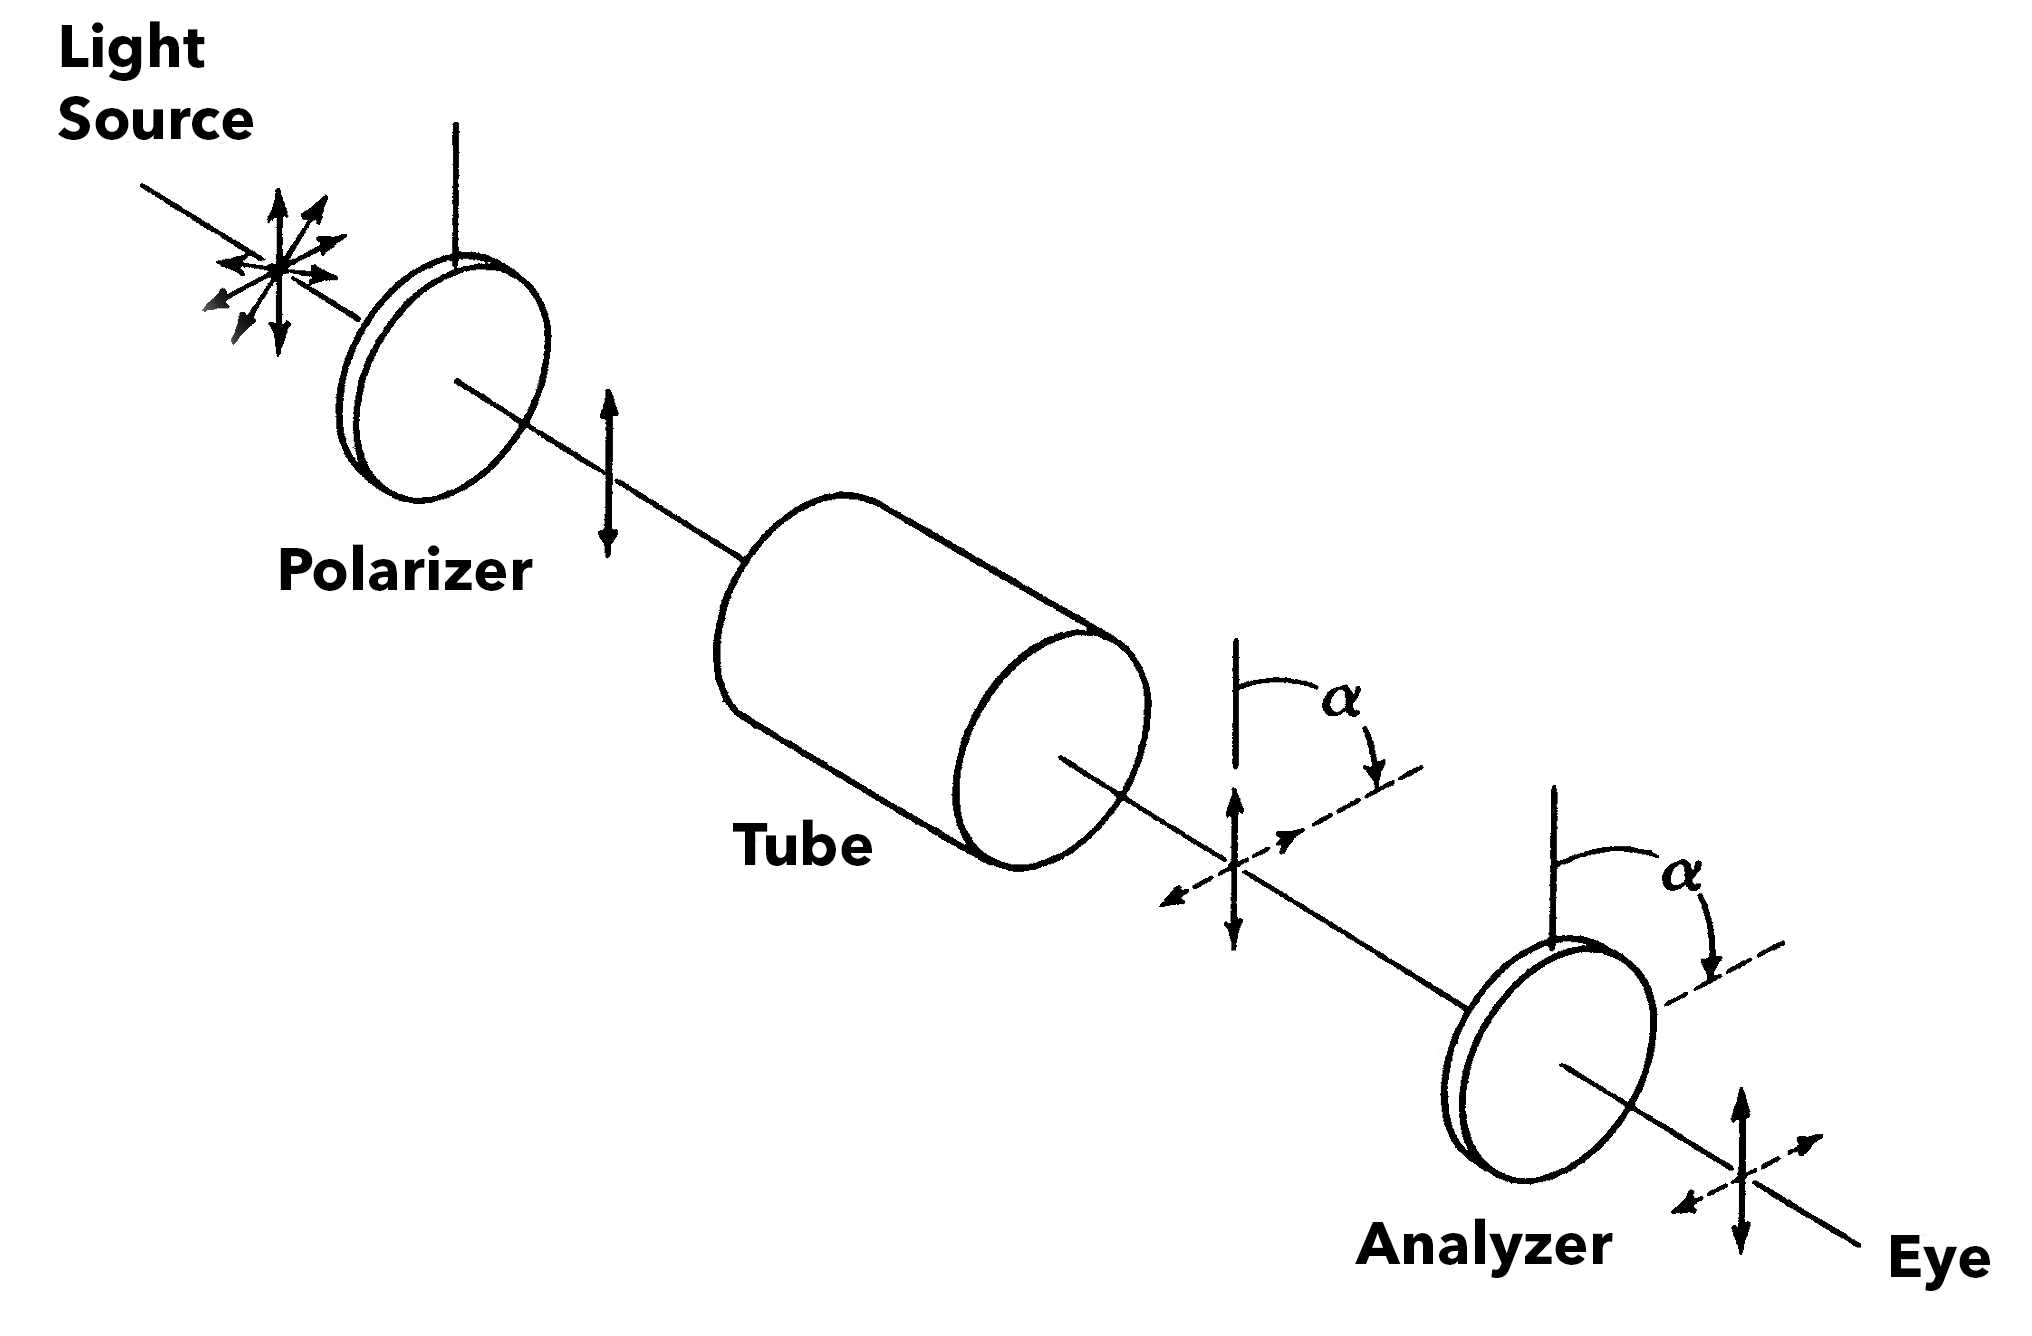 Polarimetry relies on light passing from one end of a sample to the other. The sample is contained within a sample tube known as a polarimeter tube. As the light passes through the tube it will twist in relation to the optically active components (or chiral compounds) within the tube. The tube itself is therefore integral to the overall measurement.
Polarimeter tubes are precision made to ensure reliable results. It is important to maintain and clean polarimeter tubes after each use as a damaged or dirty tube will result in reading error.
Correct Assembly of a Polarimeter Tube
As the tube length forms part of the overall experiment, it is imperative that the tube is assembled in the correct order.
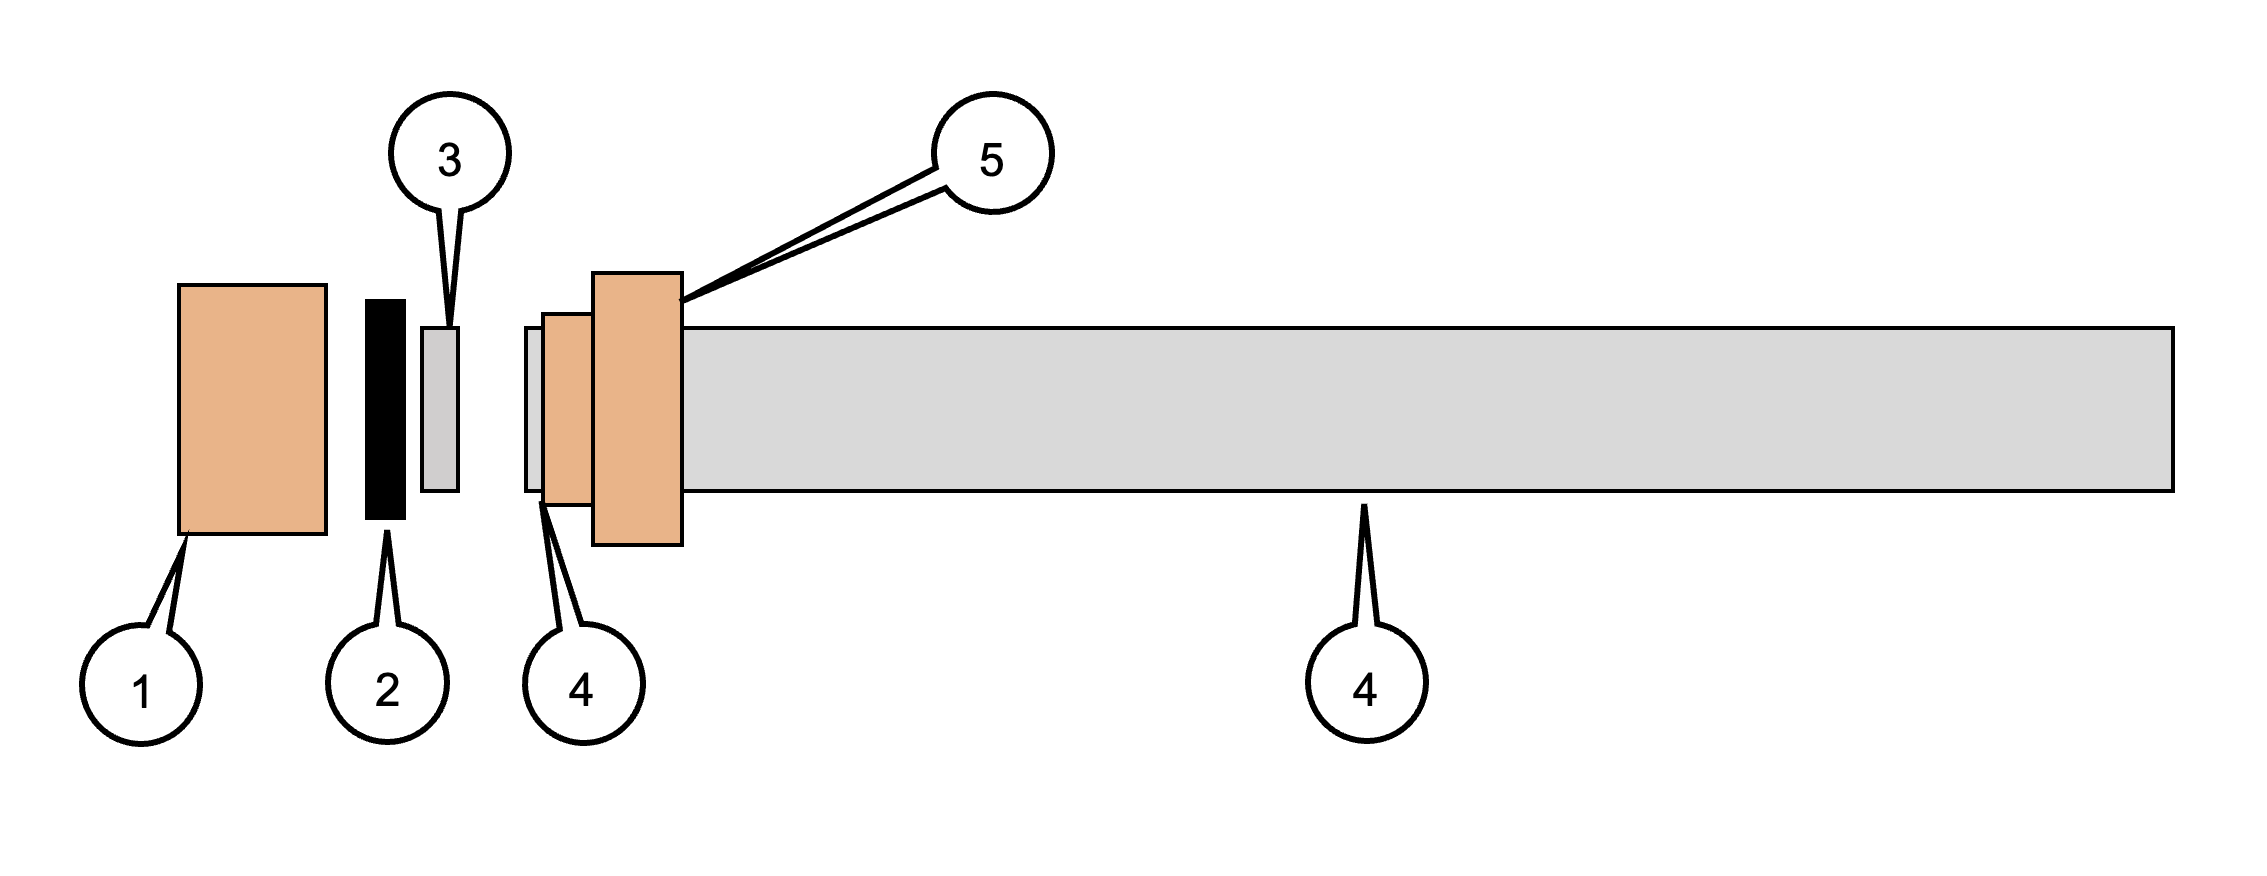
- End Cap
- Washer
- Window (also known as cover glass)
- Polarimeter Tube (protrudes 1mm from collar)
- Collar
Importantly, and possibly defying what could be considered as normal logic, the window sits directly against the tube to form a seal rather than the washer fitting between the window and the tube. This is to maintain the light path length required for the overall reading. Note that the tube protrudes approximately 1mm from the collar (4) to ensure a glass-to-glass interface.
The washer itself is used purely to apply light pressure against the window so that the washer/tube interface provides a seal. A good tip is to put the washer inside the end cap, where you will find a slight indent that allows the washer to seat correctly and not fall out when assembling the tube. Ensure that the rubber washer is seated in the indent otherwise the force from the rubber washer will not be even on the window, which may cause a leak.
How tight should the end cap be?
The end of the polarimeter tube and the window is precision ground so that when seated against each other a seal is made. Little force is needed to make the seal and overtightening can be detrimental to the overall reading.
So, screw the cap on to the collar and when resistance is felt simply “nip” the cap to ensure slight pressure is made.
For low volume tubes that have two screws holding a metal frame that ensures the window in place, tighten each screw alternatively until it meets the window and then apply a ¼ turn to make the seal.
NEVER overtighten windows. Always make sure the polarimeter tube end surface is free from grit.
Maintenance and Cleaning
Polarimeter tubes vary according to their application but essentially, basic maintenance and cleaning is the same no matter what type of tube is being used.
- Always empty and clean the tube immediately after taking readings
- Never leave samples in the tubes for long periods
- Remove the end cap and window. This is typically done by unscrewing however, for low volume tubes, this will involve removing the two screws that fold the cap window in place
- Wash tube and the windows using an appropriate solvent (water for aqueous solutions or the appropriate solvent for other compounds)
- Dry the tube and windows using ethyl alcohol. This evacuates any water and immediately evaporates to leave the polarimeter tube perfectly clean without smears or contaminants remaining on any surfaces
- Ensure the tube and windows are scrupulously clean and free form fingerprints or marks.
- Use a lint free cloth to polish any smears that remain on the window
- NEVER use acetone, white spirit or other abrasive fluids or materials that may scratch the window
Reassemble the tube in the correct order as shown in the diagram
REMEMBER: The window must be in direct contact with the end of the tube without any gasket material in between. The washer must be placed between the end cap and the window. The end cap should be lightly finger-tightened just enough to prevent leaking. Over tightening will stress the window, which will cause optical rotation and measurement errors.
How often should I clean the tube?
That’s simple. After each use.
The tube is inherent to good readings so if you want reliable results, then start by having a high quality, precision made tube that is damage free and in clean condition.
How can I check if my tube is clean?
If you want to be confident about a clean tube you can check it in your polarimeter.
- First, zero your instrument without a polarimeter tube in the chamber. The result should be 0.00.
- Place your empty polarimeter tube in to the polarimeter and take a reading
- If the tube is perfectly clean, the result will be 0.00 (± instrument precision)
- If it’s not, then the tube should be cleaned and the end cap tightness inspected
- When both are made good, repeat the experiment to achieve 0.00 (± instrument precision)
Spare Parts
Occasionally you may need to replace washers, windows and end caps. These are readily available from Bellingham + Stanley, Refractometer Shop and through our international network of local distributors.
Caution: Always use an appropriate solvent to clean the polarimeter tube, instrument’s painted surface or the touchscreen. Check material compatibility between the polarimeter tube and sample under test or the solvent being used for cleaning. Avoid spilling sample over instrumentation. Clean spills immediately. Avoid using aggressive solvents or any abrasive cleansers. Wear appropriate PPE. Contact Bellingham + Stanley for advice on chemical compatibility.
Contact Us
Contact our Customer Care Team for further assistance on this or any other matter, we’ll be pleased to help.